


Managing application state in large React projects can quickly become a significant hurdle. What starts as a simple prop drill often evolves into a complex web of callbacks, context providers, and potential performance bottlenecks.
For years, Redux offered a powerful, predictable solution, but its traditional setup often came with a heavy dose of boilerplate and a steep learning curve. This is where Redux Toolkit steps in, dramatically simplifying the Redux experience for modern React development.
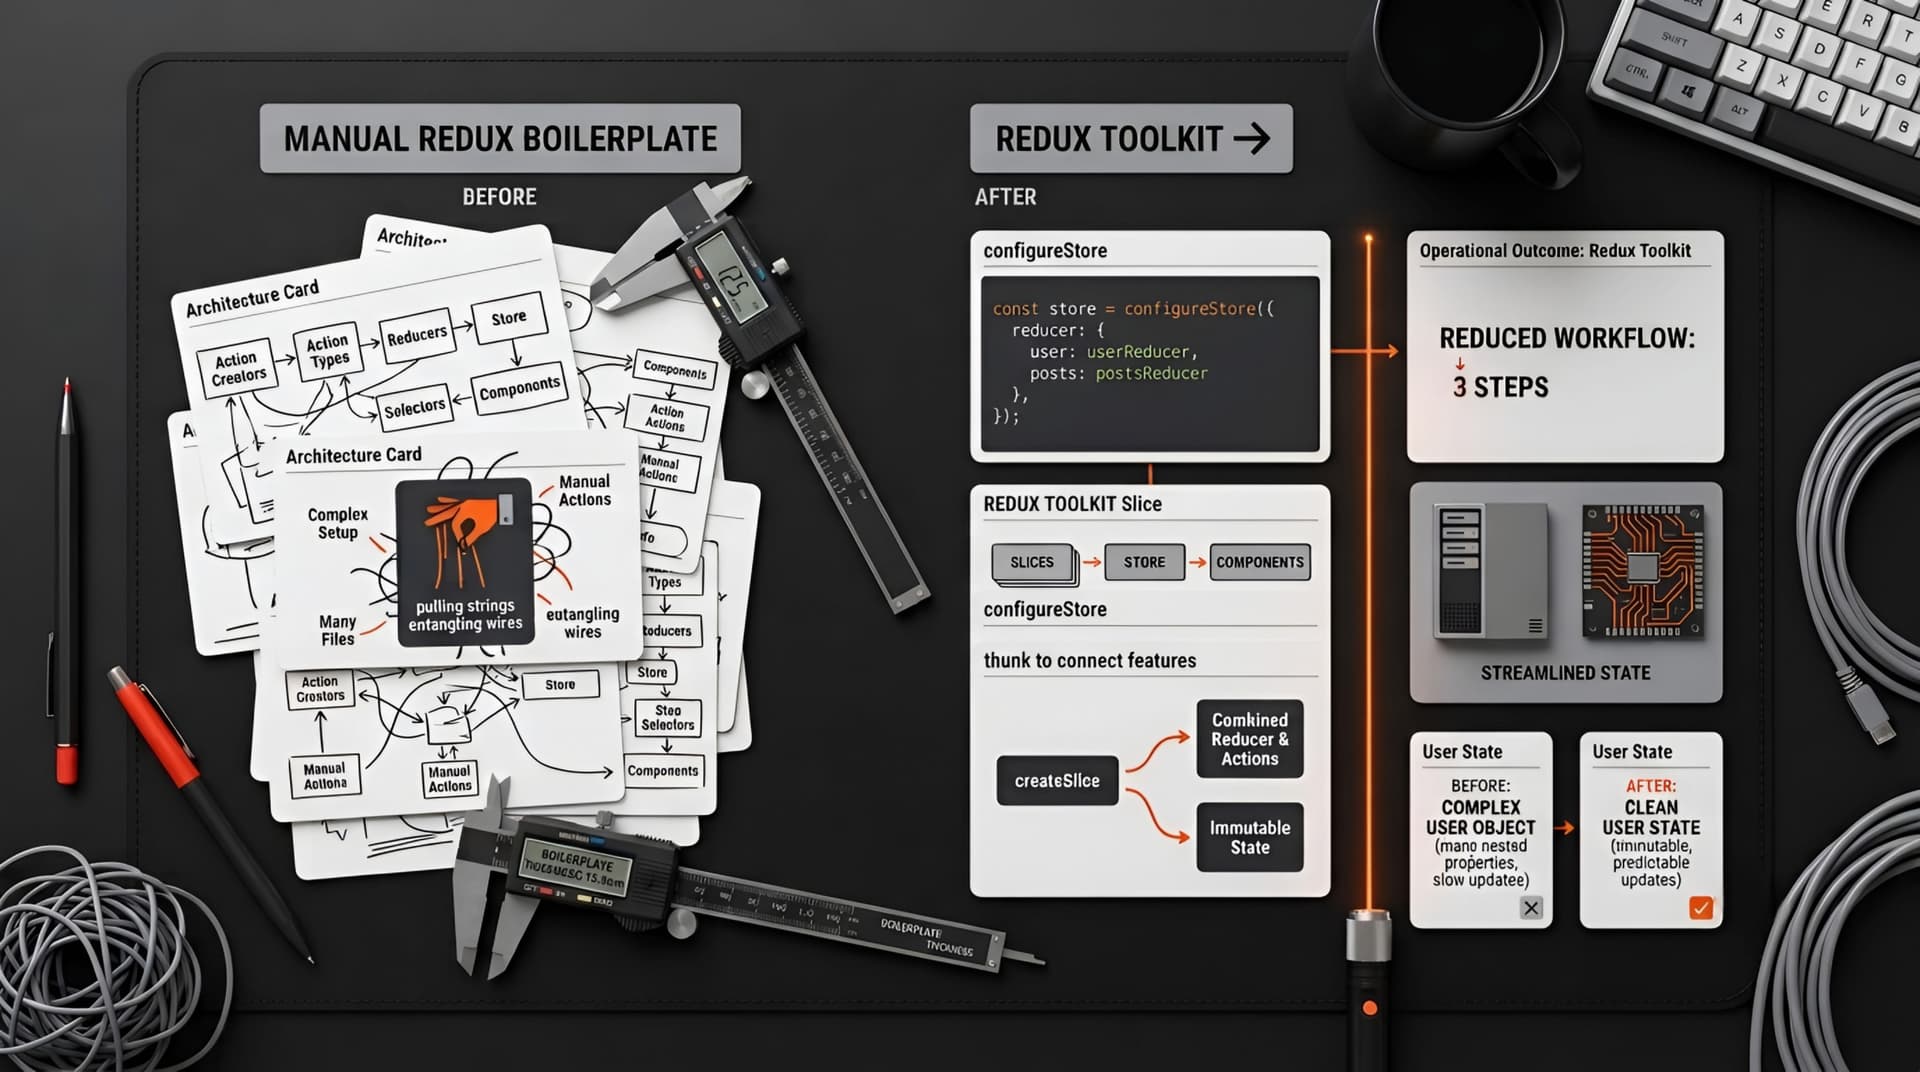
The Pain Point: Traditional Redux Boilerplate
Before Redux Toolkit, setting up Redux involved several distinct steps: defining action types, creating action creators, writing reducers with immutable updates, and configuring the store with middleware. Each new feature often meant repeating this pattern across multiple files.
This verbosity wasn't just tedious; it introduced opportunities for errors and made refactoring a daunting task. Developers spent more time managing the mechanics of Redux than focusing on the actual application logic.
At Muhyo Tech, we've seen firsthand how excessive boilerplate can slow down development cycles and increase maintenance overhead. Our goal is always to build systems that are robust and easy to evolve, and that often means embracing tools that reduce unnecessary complexity.
Enter Redux Toolkit: A Modern Approach
Redux Toolkit (RTK) was created to address these pain points directly. It's the official, opinionated, batteries-included toolset for efficient Redux development. It wraps common Redux patterns and includes essential utilities like Immer, Reselect, and Redux Thunk out-of-the-box.
This means you get powerful tools pre-configured, letting you focus on writing the core logic for your application's state. It streamlines everything from store setup to writing reducers and handling asynchronous logic.
Getting Started: Core Concepts and Setup
1. Installation
To begin, install Redux Toolkit and React-Redux in your project:
npm install @reduxjs/toolkit react-reduxThis gives you everything you need to start building. It’s a lean setup that quickly gets you to the good stuff.
2. Configuring the Store with configureStore
The configureStore function simplifies store setup significantly. It handles combining reducers, adding the Redux Thunk middleware, and setting up the Redux DevTools Extension automatically.
// src/app/store.js
import { configureStore } from '@reduxjs/toolkit';
import counterReducer from '../features/counter/counterSlice';

export const store = configureStore({
  reducer: {
    counter: counterReducer,
  },
});
This minimal configuration replaces many lines of traditional Redux setup, providing a robust and ready-to-use store.
3. Creating Slices with createSlice
createSlice is the heart of Redux Toolkit. It generates a reducer function, action creators, and action types for you, all from a single object. This eliminates the need to write them manually.
// src/features/counter/counterSlice.js
import { createSlice } from '@reduxjs/toolkit';

const initialState = {
  value: 0,
};

export const counterSlice = createSlice({
  name: 'counter',
  initialState,
  reducers: {
    increment: (state) => {
      state.value += 1;
    },
    decrement: (state) => {
      state.value -= 1;
    },
    incrementByAmount: (state, action) => {
      state.value += action.payload;
    },
  },
});

export const { increment, decrement, incrementByAmount } = counterSlice.actions;
export default counterSlice.reducer;
Notice how Immer is used under the hood, allowing you to write 'mutating' logic inside reducers while still producing immutable state updates. This greatly improves readability and reduces common errors.
4. Connecting to React Components
To make the Redux store available to your React components, wrap your application with the Provider component from react-redux.
// src/index.js
import React from 'react';
import ReactDOM from 'react-dom/client';
import './index.css';
import App from './App';
import { store } from './app/store';
import { Provider } from 'react-redux';

const root = ReactDOM.createRoot(document.getElementById('root'));
root.render(


);
Then, in your components, use the useSelector hook to read state and the useDispatch hook to dispatch actions.
// src/features/counter/Counter.js
import React from 'react';
import { useSelector, useDispatch } from 'react-redux';
import { increment, decrement, incrementByAmount } from './counterSlice';

export function Counter() {
  const count = useSelector((state) => state.counter.value);
  const dispatch = useDispatch();

  return (
    <div>
      <button onClick={() => dispatch(decrement())}>-</button>
      <span>{count}</span>
      <button onClick={() => dispatch(increment())}>+</button>
      <button onClick={() => dispatch(incrementByAmount(5))}>Add 5</button>
    </div>
  );
}
This integration is clean and leverages modern React hooks, making state access and updates straightforward.
The Business Value: Faster, More Maintainable Apps
For founders and business owners, the choice of state management directly impacts project timelines and long-term costs. Adopting Redux Toolkit offers tangible benefits:
- Faster Development Cycles: Less boilerplate means developers can implement features more quickly, accelerating time-to-market for new functionalities.
- Reduced Maintenance Overhead: Cleaner, more concise code is easier to read, understand, and debug. This reduces the risk of bugs and simplifies future updates.
- Improved Developer Experience: Happier developers are more productive. Redux Toolkit's intuitive API reduces frustration and makes onboarding new team members smoother.
- Scalability and Robustness: By enforcing best practices and simplifying complex patterns, RTK helps build more resilient applications that can grow without collapsing under their own weight.
At Muhyo Tech, when we design full-stack web applications or complex admin dashboards, we prioritize architectural choices that deliver these benefits. Tools like Redux Toolkit are key to our approach for building scalable digital systems.
For a deeper dive into overall state management strategies in React, you might find our pillar article, Mastering React State Management: A Guide to Scalable Architectures, particularly insightful.
Beyond the Basics: Async Logic with createAsyncThunk
Handling asynchronous operations, like API calls, is a common requirement in web applications. Redux Toolkit simplifies this with createAsyncThunk.
This utility generates action types for pending, fulfilled, and rejected states, and automatically dispatches them based on the Promise lifecycle. It integrates seamlessly with createSlice to update your state based on these async actions.
// src/features/users/usersSlice.js
import { createSlice, createAsyncThunk } from '@reduxjs/toolkit';

// Async thunk to fetch users
export const fetchUsers = createAsyncThunk('users/fetchUsers', async () => {
  const response = await fetch('/api/users');
  return response.json();
});

const usersSlice = createSlice({
  name: 'users',
  initialState: { list: [], status: 'idle', error: null },
  reducers: {},
  extraReducers: (builder) => {
    builder
      .addCase(fetchUsers.pending, (state) => {
        state.status = 'loading';
      })
      .addCase(fetchUsers.fulfilled, (state, action) => {
        state.status = 'succeeded';
        state.list = action.payload;
      })
      .addCase(fetchUsers.rejected, (state, action) => {
        state.status = 'failed';
        state.error = action.error.message;
      });
  },
});

export default usersSlice.reducer;
This pattern provides a clear, structured way to manage the various states of an asynchronous operation, from loading to success or failure.
Conclusion: Embracing Modern Redux
Redux Toolkit transforms the experience of using Redux in React. It removes the historical pain points of boilerplate and complexity, offering a streamlined, opinionated, and highly effective way to manage application state.
For developers, it means a more enjoyable and productive workflow. For businesses, it translates into faster feature delivery, more robust applications, and easier long-term maintenance. Embracing Redux Toolkit is a clear step towards building more efficient and scalable React applications.